Part 0 - The ‘Big Picture’ overview
Before getting stuck into how to create a Rhasspy Base + Satellite system, lets first take a step back and look at the big picture. I assume you are already familiar with the Voice assistant concept – that we can speak a command which will be performed by our Home automation system.
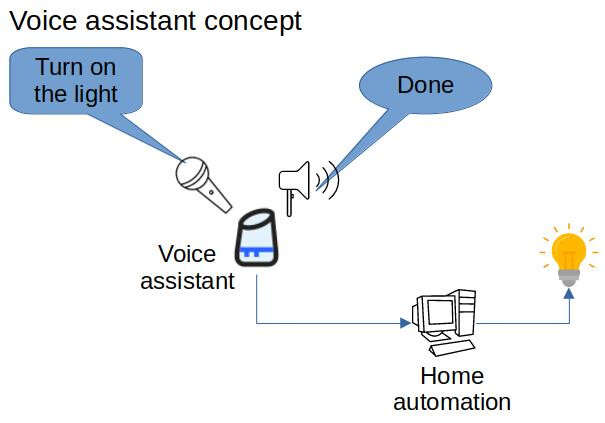
In the Google, Amazon, Apple and most other Home Automation systems the bulk of the work is performed “in the cloud”, which means out of your control. They have invested a lot of money and effort, and their products do work well … but (like facebook) their business model includes collecting information about you which they sell to pay the running costs of their cloud service.
In contrast, Home Assistant and Rhasspy are Open Source (free) projects with a focus on keeping your information and control local – ie within your home. I assume you are already familiar with Home Assistant, are wanting to add Rhasspy voice assistant, and that you want to use your voice assistant in multiple room through your home - and thus you want “Rhasspy’s Base + Satellite” configuration.
Overview of Rhasspy Voice Assistant
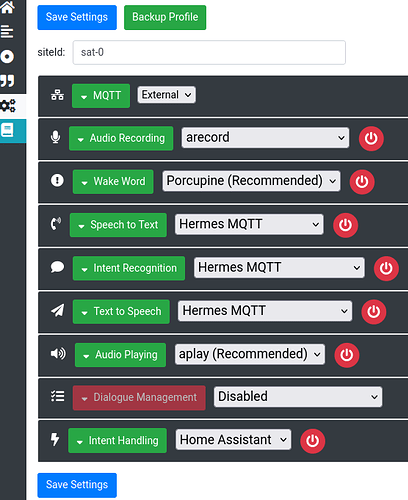
Rhasspy was intended as a toolkit and framework,covering 6 stages in processing a voice command plus a couple of related services, and providing multiple options at each stage. A while back Rhasspy was updated to allow these modules to run on different machines; thus allowing cheap Satellites plus more powerful shared central computer(s) doing the heavier processing tasks - and leaving it up to the user to decide what stage is performed where.
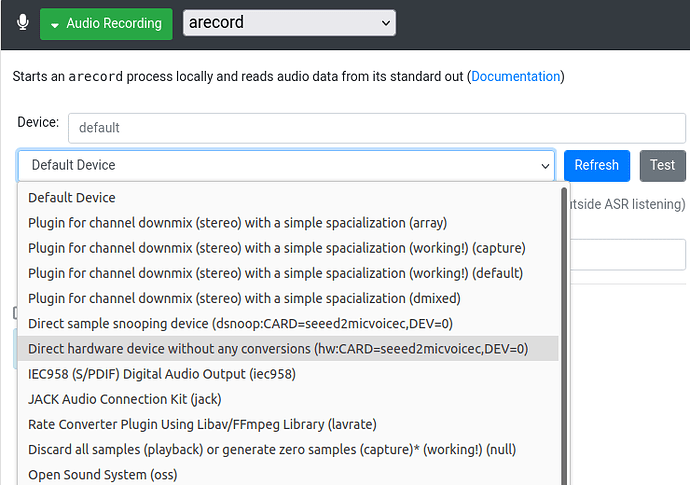
 Audio Input - Listens to the microphone and records commands
 Wake Word - Listens for the “wake” word - similar to “Alexa” or “hey Google”
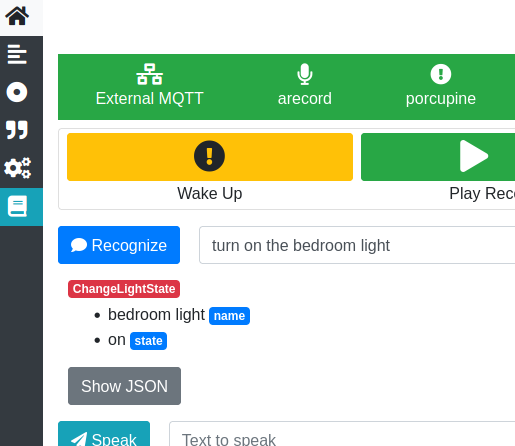
 Speech Recognition - Converts voice commands into text. Eg “Turn the bedroom light on”
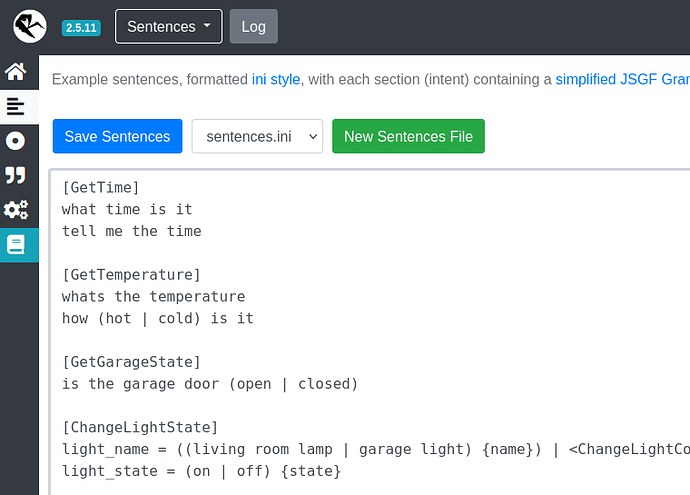
 Intent Recognition - Recognises the users intention (called intents and slots) from text. Eg intent=switch_light, device=bedroom_light, action=on
 Intent Handle - Sends recognised intents to other software to be actioned. Eg home Assistant turns off a light
 Text to Speech - Translates text to an audio file.
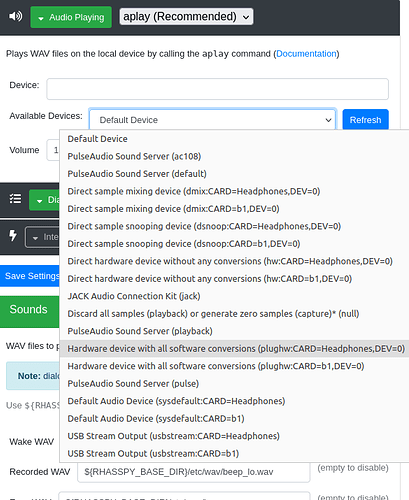
 Audio Output - Plays audio through a speaker. Eg to speak “Bedroom light is on”
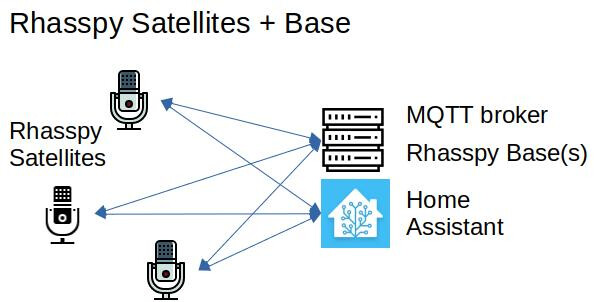
In Rhasspy’s terminology, “Satellites” are small cheap devices containing microphone and speaker placed in multiple rooms around the house; that communicate with a “Base station”. The Rhasspy Satellite hears the audio and then coordinates the processing flow, including calling services on the Base station to do most of the number crunching.
So far, the most popular Rhasspy configuration seems to be a Raspberry Pi Zero with microphone and speaker performing the Audio Recording and Wake-word detection and Audio Output for any response to the user. The compute-intensive tasks (Speech-To-Text , intent recognition, and Text-To-Speech) can better be performed by a more powerful shared computer (a RasPi 4 works fine, but a used PC is better). Historically Raspberry Pi single-board computers were cheap, readily available general purpose computers … which made them ideal for any enthusiast wanting to give it a try. Note that this is far from being the only division of services; or the best hardware combination !
The same Rhasspy program and user interface runs on both the Satellites and Base station – which can be confusing - the difference is in which modules are enabled on each computer.
Along with Rhasspy, the Base station often runs 2 more “virtual machines” physically on the same machine running :
• MQTT message broker communicates between all the different components
• a separate system such as Home Assistant to action the voice commands.
Note that one computer can run all the stages, effectively being both Satellite and Base.
While Rhasspy’s documentation (Rhasspy) does contain all the information you need to build a Base + Satellite configuration, it is not organised in a way that makes it easy. That is the purpose of this tutorial.
Useful references: Rhasspy and https://community.rhasspy.org/
Rhasspy Base station computer
A Rhasspy Base station is a computer running Rhasspy, which provides compute-intensive services as required to the Satellites. Because of the higher CPU load (and the fact it is shared among all your satellites), an old PC, NUC, or Virtual Machine (VM) on a powerful computer is a popular choice … but a Raspberry Pi 3B or 4 will do fine to get started.
The Base station may have microphone and speaker connected and also operate as a Satellite.
Rhasspy Satellite computer
A cheap low-power computer with microphone and speakers. Several satellite units can be located throughout the house, providing a voice assistant service.
Note: that the hardware discussed here should NOT be considered required, or even a recommendation – it is simply what I had available and so what I used. The same general procedure in this tutorial applies whatever hardware you choose.
UPDATE Dec-2022: Since this was written Raspberry Pi’s have become hard to get and expensive. But there is currently no recommended option for satellites 
Processor board
The Raspberry Pi Zero is cheap and small, with only one USB port and no wired Ethernet connector. We will use it “headless” (without keyboard or screen connected) through it’s built-in WiFi – so these are not actually limitations.
A Raspberry Pi Zero is certainly usable, however its slower processing speed results in a noticeable delay before you can speak your command – so if you don’t already have a Raspberry Pi to be a satellite, I strongly recommend spending a little more to get one of the newer Raspberry Pi Zero 2 W’s or a Raspberry Pi 3A+. These both have a faster processor and similar I/O for not much more cost. This tutorial is the same for these boards.
If you already have a spare Raspberry Pi 3B or 4 laying around, these also make a great satellite – though their extra hardware and cost is not needed for a satellite.
Sound cards
If using a Raspberry Pi, there are several variations of the 2-mic HAT which are equivalent, all using the seeed reSpeaker driver. These attach to the Raspberry Pi through its GPIO pins.
| Microphone card           | On-board Speaker                      |  other
|---------------------------|---------------------------------------|-----------------|
| Seeed ReSpeaker 2-mic HAT | Mono JST and headphone                | 3 LEDs, button
| Adafriut Voice Bonnet     | Left and right JST, and headphone     | 3 LEDs, button
| Seeed ReSpeaker 4-mic HAT | None. Will have to use Raspberry Pi’s | 12 LEDs
Note that while these are popular and convenient, the reSpeaker driver does not appear to take advantage of multiple microphones, so we do not automatically get better quality of audio.
The Raspberry Pi IQaudio Codec Zero uses a different chip to the reSpeaker devices, and has a different driver. I have not used this board, so cannot comment on it.
For voice assistant use, a simple USB sound card with speakers and microphone can also give similar results – but slightly different setup.
There are other multi-microphone units (such as ReSpeaker USB Mic Array - Seeed Wiki) with firmware providing features like Voice Activity Detection, Direction of Arrival, Beamforming, Noise Suppression, De-reverberation, Acoustic Echo Cancellation … but at a price.
Cases
Curiously I have only found a couple of 3D printer models for cases to put your Satellite in.
Satellite Site-IDs
Rhasspy has been designed to cover the whole house by working with multiple Satellites, and so it is important to know which room a voice command was given in – ie which Satellite is processing the command – both to send the acknowledgement to the correct Satellite, but also because we want to be able to say “Turn on the light” and for Home Assistant to know which room the command was given in.
It is important that each Satellite is given a unique ID, and that all the Satellite IDs are listed at the Base station.
Related technologies and terms
When someone builds a house they start by investing in a toolbox full of gadgets to do different jobs, and pre-made sub-assemblies (like windows, kitchen cabinetry, even whole walls). In the same way, as computer programs evolved into Applications (a suite of programs working together) and became more complex it becomes desirable to build and use software tools. The tools may only be incidental to the end result, but it certainly helps to know which end of the hammer to hold.
In practice, there are quite a few concepts and technologies for a beginner to get their head around in order to get this project running. You don’t need to become an expert – but I have found FOSS (Free and Open Source Software) projects tend to focus on the technical details and often forget that an overview is an ideal starting point.
• Home Assistant OS and Rhasspy
• Containers, Virtual Machines, and Docker
• HACS (Home Assistant Community Store – for unauthorised add-ons)
• File Editor and SSL/terminal (if satellite is headless) add-ons
• MQTT message broker
Lets take a moment to quickly look at some key terms and technologies which are used by Rhasspy.
hostname
All computers are identified on a network by its unique IP Address, like 192.168.1.100. These numbers can be hard for humans to remember, so a method of allocating a name to each computer is used, called a hostname.
On a Raspberry Pi, the hostname given to the machine is defined in raspi-config. To access the , follow the hostname with “.local” (eg: http://raspberrypi.local).
Having said that, I personally prefer to use the IP addresses rather than think up (and remember) meaningful hostnames.
Note that the “site-ID used by Rhasspy is not related to the machines hostname.
Home Assistant
An open source project providing a Home Automation system which is modular, expandable and runs locally – without reliance on cloud servers or external service providers.
Useful references: Documentation - Home Assistant and https://community.home-assistant.io/
Home Assistant can be installed on a wide variety of computers, and with 4 installation styles (mainly depending on how much of the maintenance you want to do yourself.
For this tutorial I assume you are using Home Assistant OS.
Virtual Machines, Containers, and Docker
To minimise unintended side effects, it became desirable to create a separate environment for each application. One approach is to create separate “virtual machines” which can run totally different operating systems independently, yet physically operate on the one physical computer.
Another approach is to place applications in separate “containers” which run using the host operating system.
Home Assistant OS automatically installs Docker, with Home Assistant running in one container, and allowing other applications (eg MQTT and Rhasspy) to run in their own containers, as though they were each in their own computer
HACS
There are many add-ons for Home Assistant, some official and integrated into Home Assistant (such as the File Editor, and MQTT Broker), and many more that are unofficial. Home Assistant Community Store (HACS) is where you can find and install many of these unofficial add-ons – similar concept to Google Play Store or Apple store.
File Editor
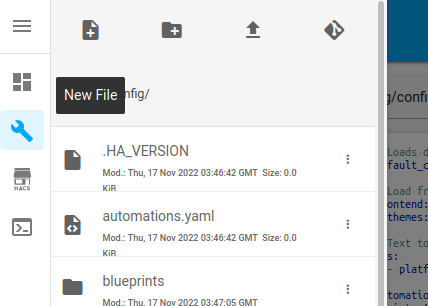
Home Assistant is moving to being configured through its Graphical User Interface (GUI) web page; but it still uses text configuration files under the hood – and the File Editor add-on is designed as an easy way to update Home Assistant’s text files.
Headless operation
Home Assistant and Rhasspy are designed to run “headless” – that is without screen or keyboard connected. They are both controlled through their web pages, so you will need a standard PC computer (running linux, MacOS or Windows) with a web browser. You will also need a terminal program and the Raspberry Pi Imager or Etcher to format and load onto a microSD card.
Command Line (CLI)
Before the point and click Graphical User Interface (GUI), we would tell computers what to do by typing commands on a keyboard using the Command Line Interface. Since we don’t want a screen keyboard and mouse connected to every satellite, there is no point our satellite using a GUI, so we will use the command line.
The Raspberry Pi computers run a variant on the linux operating system. Some operations require higher privilege - which we prefix these commands with “sudo” to tell the computer to run them as the ‘superuser’.
Terminal / Secure Shell (SSH)
Normally a keyboard, mouse and monitor screen directly connected to the computer are used to enter commands and view the results; called the console terminal.
Linux also provides for remote terminals – a program running on another computer, which relays the users input and the host computers output, as though it is directly connected. SSH (Secure Shell) is the most common method for this, and is available in most Windows, macOS and linux Terminal programs. There are many alternatives such as telnet and puTTY.
SCP (SecureCopy) is part of SSH, and uses SSH to copy files to the remote system which is running SSH.
Mosquitto / MQTT
Mosquitto is an application which provides a MQTT (Message Queue Telemetry Transport) server, used to communicate messages between all sorts of applications and devices; without any knowledge of the messages themselves.
Normally we think of messages like postal letters or txt messages – sent from one address directly to another specific address or phone number. MQTT is more like a bulletin board where anyone can place a message card (publish a message) under a topic on the board, and everyone can read it (or subscribe to listen to copies of the message as they are published). This easily handles situations where no-one is publishing to that topic, no-one is listening, or there are multiple listeners.
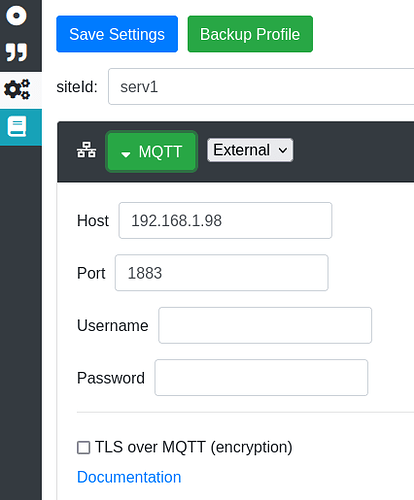
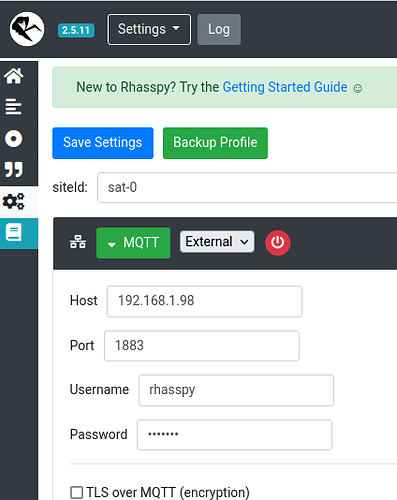
Rhasspy automatically installs Mosquitto MQTT broker for messaging between the Rhasspy modules running on that machine, called “Internal MQTT”. Because it is self-contained, it is set up with few settings; and is suitable where all the Rhasspy modules are running on the same machine.
However a common External MQTT is required for communication between multiple satellite machines and/or multiple applications (eg driving the LEDs). In our case we will use Home Assistant’s Mosquitto MQTT Broker Add-on.
Useful references: MQTT - Home Assistant
Both Internal or External MQTT options are discussed in Tutorials - Rhasspy.
HermesLEDControl
Rhasspy provides audio responses via beeps to let you know the Wake word was recognised, that it has detected the end of a sentence, and it was unable to recognise a command. Since the reSpeaker boards have colour LED lights built in, we can use them to give visual as well as audio feedback.
The HermesLEDcontrol (HLC) module listens to the MQTT messages, and display various patterns on the reSpeaker LEDs to give visual feedback to the user.
Useful references: Home · project-alice-assistant/HermesLedControl Wiki · GitHub
Preparation
The traditional approach is to install one component at a time, following different tutorials. Since we have a vision of the end result and want to minimise the swapping between devices, I have chosen to do some things out of order. I suggest you tick off each step as you do it, so you don’t accidentally miss something that might not seem obvious.
There are several values which you can decide, which will be used throughout this document. I suggest you note down the vales for later reference:
• You will need to decide on unique Satellite IDs for the Base station and each Satellite. If you know where you’re going to place the satellite, you might use the location in the siteID, because, well it would be nice for Home Assistant to know that you’re speaking in the bedroom when you ask it to turn on the light ;-).
I called mine “base”, “sat-1”, “sat-0” because I have no imagination, and I was unsure which room I will end up putting them.
• Your values:
Base station ID: _____________ Satellite(s): _______________________________
• External MQTT requires a username and password. You can use an existing user, but I created a new Home Assistant user to be used by MQTT and Rhasspy.
Rhasspy MQTT username: ___________ password: _________________
• What do you wish to use as name (optional) and/or IP addresses for your machines:
base station hostname: ______________ IP: ________________
Satellite hostname: ______________ IP: ________________
Satellite hostname: ______________ IP: ________________
![]()


 Audio Input - Listens to the microphone and records commands
 Wake Word - Listens for the “wake” word - similar to “Alexa” or “hey Google”
 Speech Recognition - Converts voice commands into text. Eg “Turn the bedroom light on”
 Intent Recognition - Recognises the users intention (called intents and slots) from text. Eg intent=switch_light, device=bedroom_light, action=on
 Intent Handle - Sends recognised intents to other software to be actioned. Eg home Assistant turns off a light
 Text to Speech - Translates text to an audio file.
 Audio Output - Plays audio through a speaker. Eg to speak “Bedroom light is on”
