Managed to get it to work pretty well with a German setup of Rhasspy. The new longer custom wakeword works so much better than the old one that was giving me false triggers even at .3 sensitivity.
The way this website mangles “” quotes really caused me some grief and I had to include an environment statement with PATH in my systemd service file. Not sure if other people will have the same problem because I (foolishly) decided to go with a 64-bit install of Rasperry Pi OS and that might be the cause of my problems there.
For reference here is what I added to the service file:
Environment=PATH=/usr/lib/rhasspy/lib/kaldi:/usr/lib/rhasspy/bin:/usr/lib/rhasspy/usr/local/bin:/usr/local/sbin:/usr/local/bin:/usr/sbin:/usr/bin:/sbin:/bin
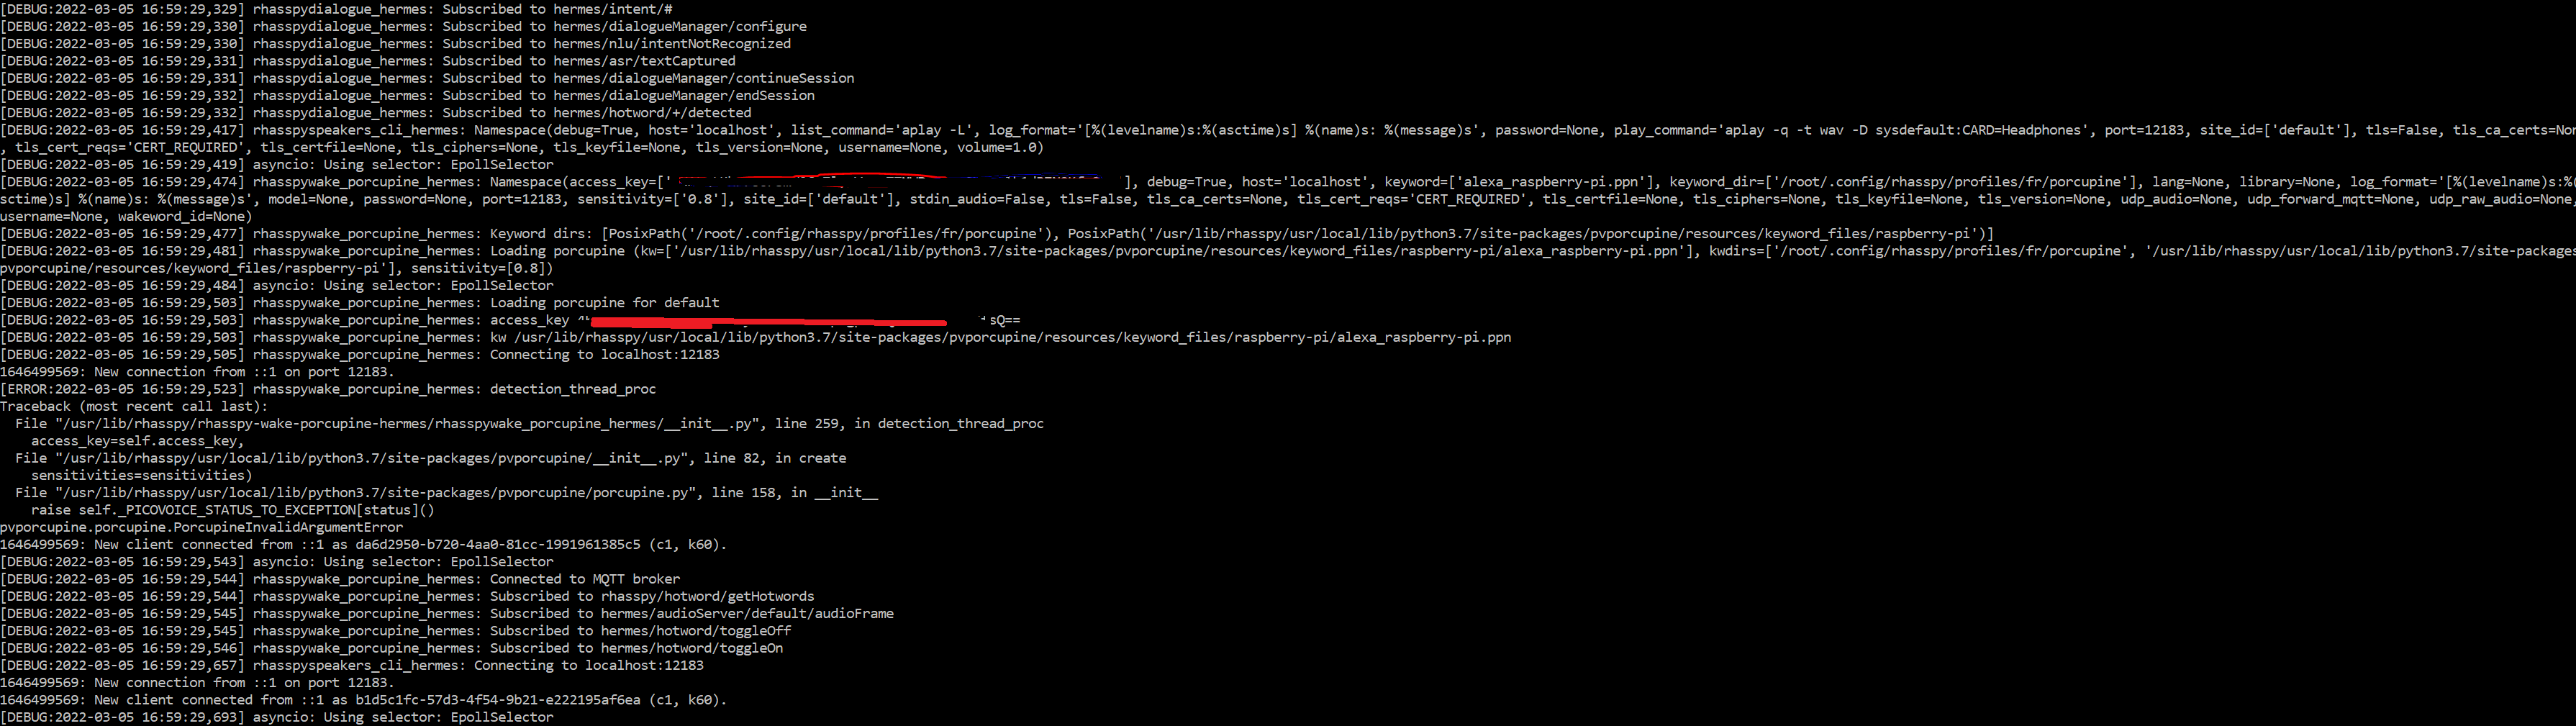
[DEBUG:2022-03-05 16:59:29,503] rhasspywake_porcupine_hermes: kw /usr/lib/rhasspy/usr/local/lib/python3.7/site-packages/pvporcupine/resources/keyword_files/raspberry-pi/alexa_raspberry-pi.ppn
[DEBUG:2022-03-05 16:59:29,505] rhasspywake_porcupine_hermes: Connecting to localhost:12183
1646499569: New connection from ::1 on port 12183.
[ERROR:2022-03-05 16:59:29,523] rhasspywake_porcupine_hermes: detection_thread_proc
Traceback (most recent call last):
  File "/usr/lib/rhasspy/rhasspy-wake-porcupine-hermes/rhasspywake_porcupine_hermes/__init__.py", line 259, in detection_thread_proc
    access_key=self.access_key,
  File "/usr/lib/rhasspy/usr/local/lib/python3.7/site-packages/pvporcupine/__init__.py", line 82, in create
    sensitivities=sensitivities)
  File "/usr/lib/rhasspy/usr/local/lib/python3.7/site-packages/pvporcupine/porcupine.py", line 158, in __init__
    raise self._PICOVOICE_STATUS_TO_EXCEPTION[status]()
pvporcupine.porcupine.PorcupineInvalidArgumentError
I am not sure why porcupine cannot start, I was trying with default wake word provided by the library
I see you have this tutorial written for a rpi zero with rhasspy installed with the .deb package. I was able to replicate your tutorlal and got it working. Although CPU usage shot up to 80 percent for me when I did.
But my question is actually, has anyone been able to do something like this on a linux server running rhasspy in a docker container? I am attempting to do that but was wondering if anyone was able to do it already
No problem. I actually got it to work. I followed the guide Sturi2011 put together but inside the docker container. I ran docker cp to copy the files out of the container, edit them and then copy them back into the container. All the file paths were the same except for the python site packages paths.
site-packages were in /usr/lib/rhasspy/.venv/lib/python3.7/site-packages
Other things to note. to install pvporcupine, the latest version was 2.1.2. Downloading my custom word from there site said it was version 2.1.0. I didnt test if 2.1.2 worked but I installed the pvporcupine version 2.1.0, while in the docker console with:
pip3 install pvporcupine==2.1.0
Also when copying anything from the guide that is not in a code box, be carefull with quotes and dashes. Anything I copied within the code blocks had no formatting issues, but anything I copied not in a code box had the formatting problems.
looking at docker logs was very helpful to find where I missed those format issues. used the below docker cmd
docker logs
To specify, I did this in a docker container on a linux machine (fedora/redhat). I assume this would work on any machine running rhasspy in a container
I also wanted to thank @Sturi2011 for putting this guide together. without it I never would have got this working.
I would love to help. But to be honest with you. I am a rookie with managing docker images and docker hub repos. So I think I did the right thing but let me know if there is something else i should do to make it easier for everyone
I have run the cmd “docker commit [container] rhasspy/rhasspy:latest”. which I think commited my changes to the default rhasspy docker repo. But not sure if this was the right thing to do.
I also created my own docker hub repo that is public and pushed my image to that repo so if you would like you can just pull the image from there. Not sure how I will have it updated with future rhasspy updates and not overwrite the changes I made. Again rookie docker manager. But i you would like to pull the image from my repo you can just replace rhasspy/rhasspy in the install guide to dblanc28/rhasspy. So it would look like below:
Probably wouldnt be a bad idea to change the name as well so you remember it wasnt from the normal repo.
Again if there is something else I should have done that would make it easier for everyone to get the changes I made, let me know and I will do that as well.
You may find a solution implemented at: https://github.com/LuisMalhadas/rhasspy
It uses the latest pvporcupine version ( 2.1.4), so this is an online version of rhasspy, but exclusively to check the key with picovoice.ai service.
This version doesn’t havedeepspeech and includes snips as well as some minor updates of some dependencies.
You’ll have to build the docker image yourself after clonning the project. It has only been tested on a raspberry pi 4.
@Sturi2011 thank you very much for your instructions.
For anyone interested in upgrading Porcupine to 2.x, I made a diff for Rhasspy 2.5.11 which makes the upgrade much more automated:
# How to upgrade Porcupine 1.9.x installed by Rhasspy 2.5.11 DEB to version 2.x

sudo su -

# Install Rhasspy 2.5.11 (replace "armel" with your architecture if needed)
wget https://github.com/rhasspy/rhasspy/releases/download/v2.5.11/rhasspy_armel.deb
dpkg -i rhasspy_armel.deb

# If you have Rhasspy already installed, just stop it.
systemctl stop rhasspy

# Install latest Porcupine.
apt update
apt install -y python3-pip
pip3 install pvporcupine

# Set installed Porcupine version in the variable below
porcupine_ver=2.1.4

# Porcupine is installed in /usr/local/lib/python3.?/dist-packages/pvporcupine
# Check it:
echo /usr/local/lib/python3.?/dist-packages/pvporcupine

# If you see anything other than "python3.7" in the path, change "3.7"
# in the variable below to the version you see...
pyver=3.7

# Move old Porcupine into ~/bcp-pvporcupine-1.9 and replace it with symlinks
# to the new version.
mkdir bcp-pvporcupine-1.9
mv /usr/lib/rhasspy/usr/local/lib/python3.7/site-packages/pvporcupine-1.9.*.dist-info bcp-pvporcupine-1.9/
mv /usr/lib/rhasspy/usr/local/lib/python3.7/site-packages/pvporcupine bcp-pvporcupine-1.9/
ln -s /usr/local/lib/python$pyver/dist-packages/pvporcupine \
  /usr/lib/rhasspy/usr/local/lib/python3.7/site-packages/pvporcupine
ln -s /usr/local/lib/python$pyver/dist-packages/pvporcupine-$porcupine_ver.dist-info \
  /usr/lib/rhasspy/usr/local/lib/python3.7/site-packages/pvporcupine-$porcupine_ver.dist-info

# Patch Rhasspy.
curl https://gist.githubusercontent.com/mprymek/f72474052aa39687af266f572e76675e/raw/7c107124faf7d7a21bdc101ba2f27bf0f9fb0f36/rhasspy-porcupine-v2.diff \
| patch -d / -p0

# (optional) Put your custom wake word file to .config/rhasspy/profiles/en/porcupine
#
# Configure your Porcupine access key and your custom wake word file in your
# profile.json:

# "wake": {
#     "porcupine": {
#       "keyword_path": "hey-hilly_en_raspberry-pi_v2_1_0.ppn",
#       "sensitivity": "0.6",
#       "access_key": "blahblahblahblahblahblahblahblahblahblahblahblahblahbl=="
#     },
#     "system": "porcupine"
# }

# If everything went well, you can now start Rhasspy.

systemctl start rhasspy
does this mean you manged to get a Matrix Voice running on Debian/Raspberry OS Bullseye?
I built the drivers as described but the card doesn’t show up as a soundcard.
Am i missing something?
Hi djfil,
I’m trying to build the docker image without success. Specifically, I have a: failed to compute cache key: “/rhasspy-tts-larynx-hermes/requirements.txt” not found: not found
But I see lot of more errors so I’m not sure where is the main problem:
Don’t know exactly, I am afk for a few days.
I suspect you are missing some pre-built packages.
You should try building the master branch, following the documentation tutorial. Once that’s working, you can try changing branches and build the new version.
I’ll get back in a few days, and may try to help more.
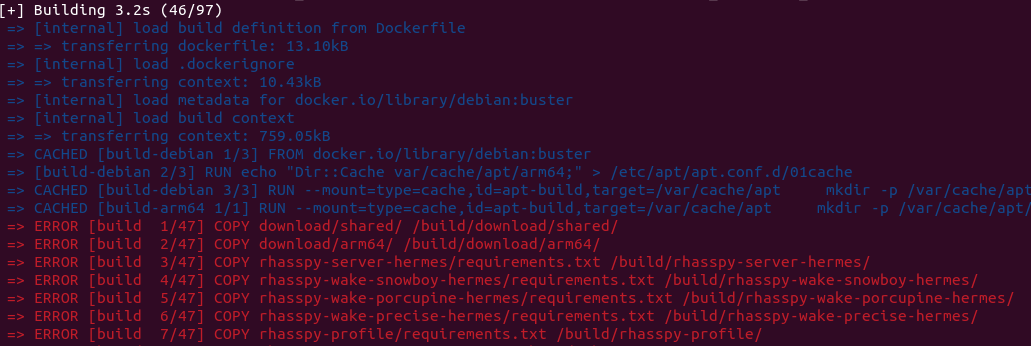
Hey i’m new to Docker maybe someone can help me. I’ve been trying to build this repo.
My steps are
cloning it…
open the folder in terminal
and then i start
sudo docker build -t ‘rhasspy_mod’ .
(im locked in at docker) im getting the error:
+] Building 1.3s (6/6) FINISHED
 => [internal] load build definition from Dockerfile                                                                                                                        0.1s
 => => transferring dockerfile: 13.10kB                                                                                                                                     0.0s
 => [internal] load .dockerignore                                                                                                                                           0.0s
 => => transferring context: 10.43kB                                                                                                                                        0.0s
 => CANCELED [internal] load metadata for docker.io/library/build-armv8:latest                                                                                              1.1s
 => ERROR [internal] load metadata for docker.io/library/run-armv8:latest                                                                                                   1.1s
 => [auth] library/run-armv8:pull token for registry-1.docker.io                                                                                                            0.0s
 => [auth] library/build-armv8:pull token for registry-1.docker.io                                                                                                          0.0s
------
 > [internal] load metadata for docker.io/library/run-armv8:latest:
------
Dockerfile:241
--------------------
 239 |     ARG TARGETARCH
 240 |     ARG TARGETVARIANT
 241 | >>> FROM run-$TARGETARCH$TARGETVARIANT
 242 |     ARG TARGETARCH
 243 |     ARG TARGETVARIANT
--------------------
ERROR: failed to solve: run-armv8: pull access denied, repository does not exist or may require authorization: server message: insufficient_scope: authorization failed (did you mean run-armv7?)